Audio normalization is crucial for achieving balanced, professional sound in digital music production. Within FL Studio, it serves to maintain consistent volume levels across your tracks.
Seeking to master audio normalization in FL Studio? This guide provides a step-by-step walkthrough, covering everything from understanding loudness and peak levels to practical application.
Why You Should Listen to Me?
Listen, I don’t just spin dials and push buttons randomly—although, don’t get me wrong, that can be fun too. I’m a seasoned digital music producer with over eight years of hands-on experience with FL Studio.
IN THIS ARTICLE
Why Normalize Audio in FL Studio?
Imagine listening to a playlist where every song had a different volume level. Annoying, right? That’s precisely what happens when you don’t normalize audio in your tracks. In FL Studio, normalization ensures your mix maintains a consistent volume level from start to finish, resulting in a more refined and professional output.
Having a uniform volume level is not just an aesthetic choice; it’s often a necessity. When your tracks have consistent volume levels, you facilitate smoother transitions between them, and your entire mix sounds harmonious.
This is especially important for compositions where multiple instruments or layers are involved. Essentially, normalization serves as a quality check, preventing any one element from overshadowing the rest.
In sum, audio normalization in FL Studio is a non-negotiable step for anyone aiming for top-notch sound quality.
Understanding Loudness and Peak Levels
Loudness and peak levels might sound like the same thing, but they’re as different as an electric guitar and a ukulele—both make music but in entirely different ways.
Loudness: Think of this as the average volume of your audio clip. Picture it as the ‘heartbeat’ of your track, a steady underlying force that gives life to your composition.
Peak Levels: These are the audio spikes, the moments when a drum hits or a singer reaches a high note. Imagine these as fireworks that light up your audio skyline momentarily.
So, why are these important? Understanding the difference between loudness and peak levels helps you make better normalization choices in FL Studio. For example, a track with high peak levels but low loudness can be misleading; you might assume it’s loud enough when it actually isn’t. And we all know, an imbalanced track is the quickest route to a listener hitting the ‘skip’ button.
In a nutshell, getting familiar with loudness and peak levels is key to mastering audio normalization in FL Studio. It allows you to strike the right balance, ensuring your audio neither whispers nor shouts, but speaks at just the right volume.
Step-by-Step Guide to Normalizing Audio in FL Studio
If you’ve ever cooked from a recipe, you know that sequence matters as much as ingredients. Same goes for audio normalization. Here’s your recipe for success.
1. Selecting Audio Clips: Open FL Studio and locate the audio clip you want to normalize. Typically, you’d right-click on the clip in the Playlist window.
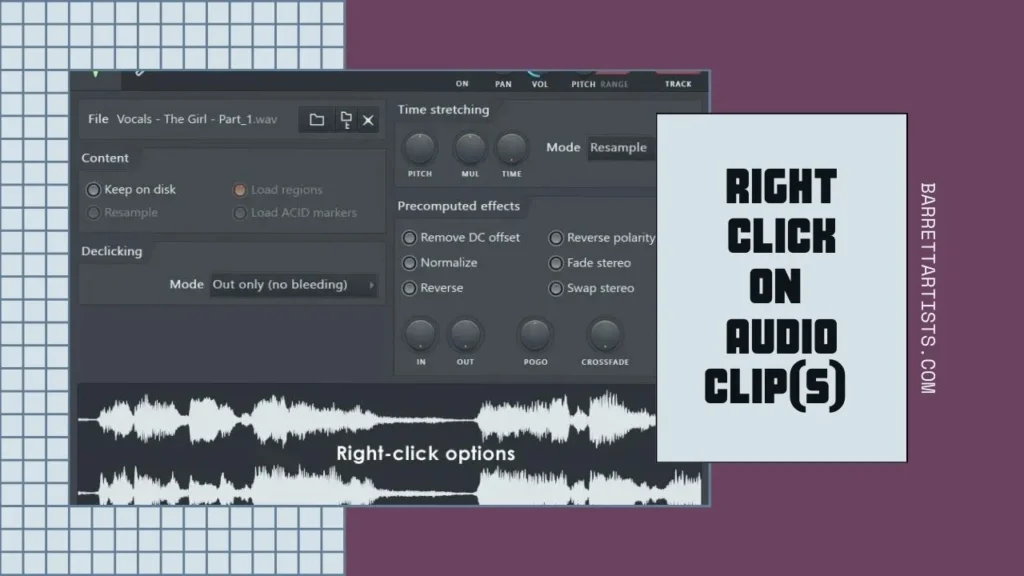
2. Applying Normalization Tools:
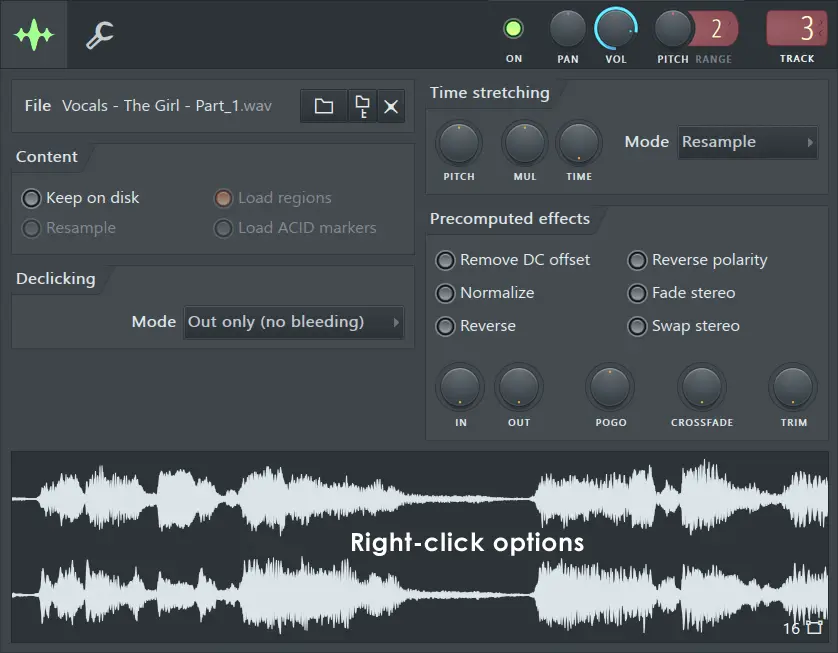
- Finding the Normalize Feature: Right-click on your chosen audio clip, navigate to ‘Channel Settings,’ and then click on the ‘Normalize‘ option inside Precomputed Effects.
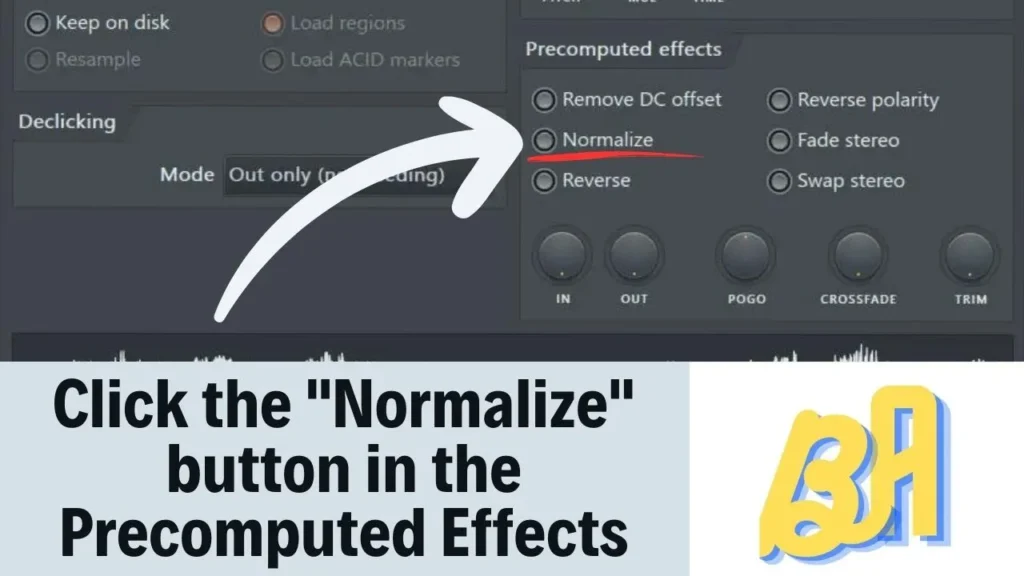
- Adjusting Volume Levels: Once you activate the normalize feature, FL Studio automatically adjusts the peak level to 0 dB, optimizing your clip’s volume. You can fine-tune this further in the Mixer if needed.
Using Plugins and Tools for Audio Normalization
No musician or producer is an island, and the same goes for software. While FL Studio’s built-in normalization features do a fine job, sometimes you might want a bit more control or nuance. Enter plugins.
Built-in vs. Third-Party Plugins
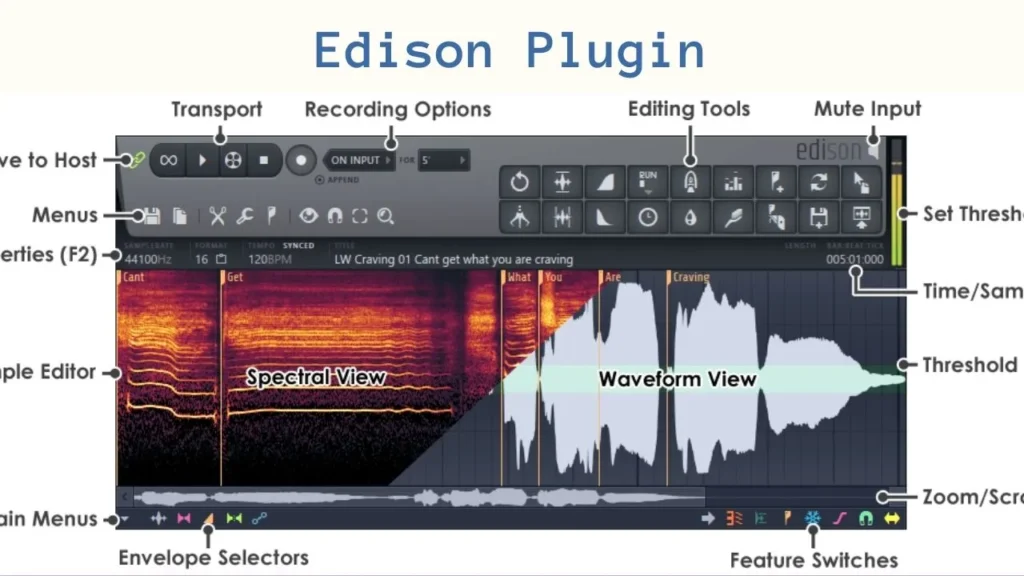
FL Studio has some built-in plugins like the Fruity Limiter or Edison Plugin that can also be used for audio normalization. However, the market also offers robust third-party plugins that provide additional functionalities.

Recommended Plugins and Tools
– Youlean Loudness Meter: Great for accurate loudness measurement.

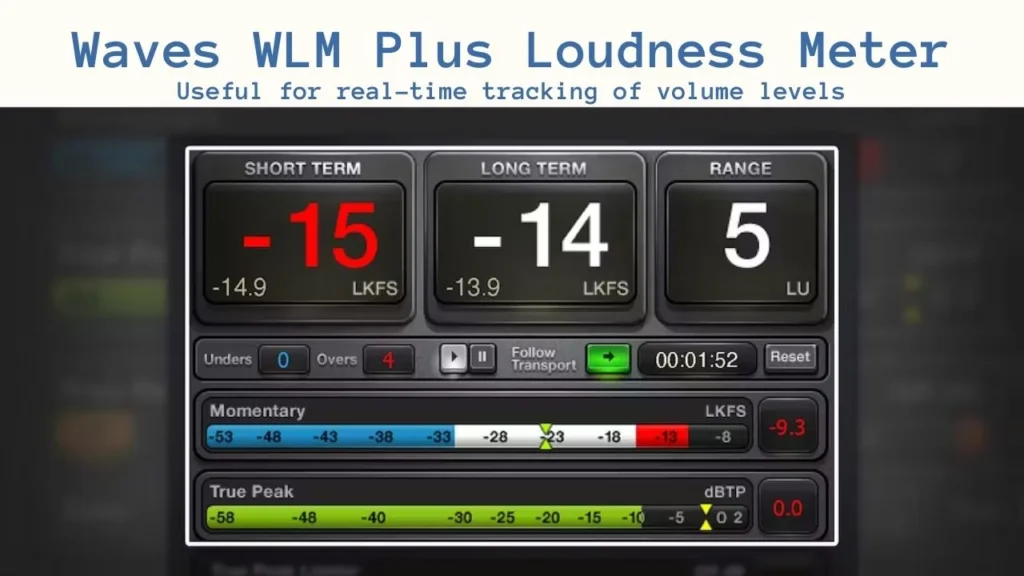
– Waves WLM Plus Loudness Meter: Useful for real-time tracking of volume levels.
– Edison Plugin: Easy To Use To Normalize Audio.
Why These Plugins?
These plugins stand out for their user-friendly interface and precision. They offer real-time loudness and peak level monitoring, which can elevate your normalization process to a professional level.
Using plugins like these can provide you with a finer brush to paint your auditory masterpiece, making sure each nuance is captured perfectly.
Common Mistakes to Avoid
Like a musician hitting the wrong note, mistakes in audio normalization can jolt your audience out of their listening experience. Here are some common missteps to watch out for:
- Over-normalizing: This can lead to audio distortion.
- Inconsistent Normalization: Imagine a choir where one singer belts it out while others whisper. Avoid normalizing different tracks to different levels.
- Ignoring the Master Track: Normalizing individual tracks but forgetting the master track. It’s just incomplete.
- Normalization Before Editing: Apply any other editing effects before you normalize, as normalization might interfere with them.
Tips on How to Avoid These Mistakes
- Use reference tracks to match volume levels.
- Always double-check your master track.
- Follow a structured workflow to ensure editing precedes normalization.
In essence, sidestepping these common mistakes can make your audio sound as harmonious as a well-conducted orchestra.
Expert Tips and Recommendations
You’ve got the basics down; now let’s jazz it up a bit.
- Use a Loudness Meter: Don’t just rely on your ears; a loudness meter can provide objective measurements.
- Automate the Process: For larger projects, consider using batch processing to normalize multiple clips at once. It’s like the “copy-paste”.
- Monitor on Multiple Systems: Always check your normalized audio on different devices to ensure it’s universally balanced.
- Limit Instead of Normalize: For advanced users, sometimes limiting can be a better option than normalization. It’s akin to choosing a sports car over a sedan—faster but requires more skill.
- Master the Art of Dynamic Range: A balanced dynamic range can make your audio more engaging. Think of it as the difference between a monotone speech and a captivating oratory.
- Never Stop Learning: Stay updated with latest trends and techniques. Trust me, in the fast-paced world of digital music production, being a lifelong learner is not optional; it’s a requirement.
These expert tips are your cheat sheet to mastering audio normalization in FL Studio. From essential tools to advanced techniques, this advice has been tried, tested, and fine-tuned for optimal results.
Conclusion
Audio normalization in FL Studio is not just another task on your to-do list; it’s an essential step in crafting a professional-quality track. From understanding the nuances of loudness and peak levels to employing the right plugins and avoiding rookie mistakes, normalization is a multifaceted process. And let’s not forget the expert tips, which are like the secret sauce in your audio recipe.
So go ahead, apply these insights, and bring your audio production skills to new heights. Your audience—and your art—deserve nothing less.
Got any questions or experiences to share? We’d love to hear from you. Drop them in the comments section below and let’s make this a two-way conversation.
FAQ’s
Is it necessary to normalize audio in FL Studio?
Normalization isn’t always mandatory, but it’s highly recommended for achieving consistent volume levels across your tracks. Think of it as tuning your guitar before a performance—not absolutely required, but definitely smart.
What is the difference between normalization and compression in FL Studio?
Normalization adjusts the highest peak to a target level, while compression affects the dynamics between the loudest and softest parts of your audio. If normalization is your warm-up act, then compression is the headliner—each plays a role in the final sound.
Should I normalize audio before mixing?
Normalizing before mixing can provide a consistent baseline, making it easier to balance various elements. It just makes everything run more smoothly.
Are there any disadvantages to audio normalization?
The process can occasionally introduce distortion or impact dynamic range if not done carefully.
Post Updates Log
- On October 18, 2023 Post Published
- On October 11, 2023, Post Reviewed and Passed QC

